All News
Daily Bridge in New Zealand

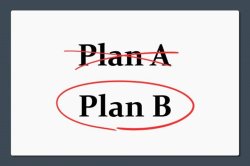
PLAN B.
Do you need one? Do you have one? You may have a very plausible way of making a contract but it becomes threatened. Do you go down graciously or try to find another way?


|
Board 13 |
|||||||||||||||||||||||||||||||
|
|
|
|||||||||||||||||||||||||||||
|
West |
North |
East |
South |
|
|
Pass |
Pass |
Pass |
|
1 ♥ |
Pass |
2 ♥ |
Pass |
|
2 ♠ |
Pass |
4 ♥ |
All pass |
Surely Board 13 is not going to be unlucky for you? North leads a small trump and South follows suit. What’s your plan?
Your partner made a standard raise to 2![]() with 2
with 2![]() showing at least three spades and needing help in that suit if game could be made. With near maximum values and a potentially useful doubleton, East jumped to 4
showing at least three spades and needing help in that suit if game could be made. With near maximum values and a potentially useful doubleton, East jumped to 4![]() .
.
Had you seen dummy before North’s trump lead, you would have a clear idea of how to make 10 tricks. With two certain spade and one certain club loser, you had to find a way to prevent a third spade loser. Absolutely no problem if the heart break is 2-2 but what to do if a common 3-1 break occurs? Since you have to lose the lead twice before ruffing any spades, chances are that continued trump leads would reduce East to just one trump, and your contract would fail.
So, your immediate plan is under threat before you knew you had it! North could have found a much friendlier lead! Be thankful that you have been dealt, mainly, with top trumps. You need to embark on a secondary plan even before you know your first one has failed.
Ruffing 3 diamonds in the West hand may prove difficult because of the lack of entries outside trumps to the East hand and the opponents' desire to keep leading trumps. However, there is another chance. So, win the opening lead in hand and cash that ![]() A. Now give up a spade… and hold your breath. Sure enough, North’s
A. Now give up a spade… and hold your breath. Sure enough, North’s ![]() J wins that trick and as quick as lightning, North produces a second little heart. Win that in dummy as South discards a club. You need to put Plan B into effect.
J wins that trick and as quick as lightning, North produces a second little heart. Win that in dummy as South discards a club. You need to put Plan B into effect.
Ruff a diamond and give up a second spade, with North winning once more to lead their last trump. Again, win in dummy and you are down to just one trump for ruffing two small spades. No joy there. So, ruff one more diamond…and the sun shines:
|
Board 13 |
|
||||||||||||||||||||||||||||||
|
|
|
|||||||||||||||||||||||||||||
|
|||||||||||||||||||||||||||||||
|
West |
North |
East |
South |
|
|
Pass |
Pass |
Pass |
|
1 ♥ |
Pass |
2 ♥ |
Pass |
|
2 ♠ |
Pass |
4 ♥ |
All pass |
Note that had the ![]() K not appeared, you would be faced either with a third spade loser in the West or a diamond loser in the East hand. You have already ruffed two diamonds in the West hand and had seen the defence play three rounds of trumps. West had no more trumps to ruff the last diamond if that, the
K not appeared, you would be faced either with a third spade loser in the West or a diamond loser in the East hand. You have already ruffed two diamonds in the West hand and had seen the defence play three rounds of trumps. West had no more trumps to ruff the last diamond if that, the ![]() Q, was not the winner.
Q, was not the winner.
In effect, you have performed a dummy reversal in ruffing two diamonds, setting up the ![]() Q as a trick and conceding three black suit losers. Setting up the dummy hand is often missed by declarers. Here, it was the necessary fall-back play you had to adopt when your main plan seemed likely to fail. If you did not start ruffing diamonds quite early, you would be unable to take advantage of the favourable early fall of
Q as a trick and conceding three black suit losers. Setting up the dummy hand is often missed by declarers. Here, it was the necessary fall-back play you had to adopt when your main plan seemed likely to fail. If you did not start ruffing diamonds quite early, you would be unable to take advantage of the favourable early fall of ![]() K.
K.
Plan A failed quite early. Be thankful, there was a plausible alternative. Maybe next time, the opponents will be kinder in their choice of opening lead.
Something a little different for the last article before Christmas, tomorrow.
Richard Solomon
Go Back View All News Items
